
A calmer summer road trip setup with an OTTOCAST baby car camera
Before your next road trip, a tidy baby camera setup can give better rear-seat visibility without turning your dashboard into a warning-light jungle.
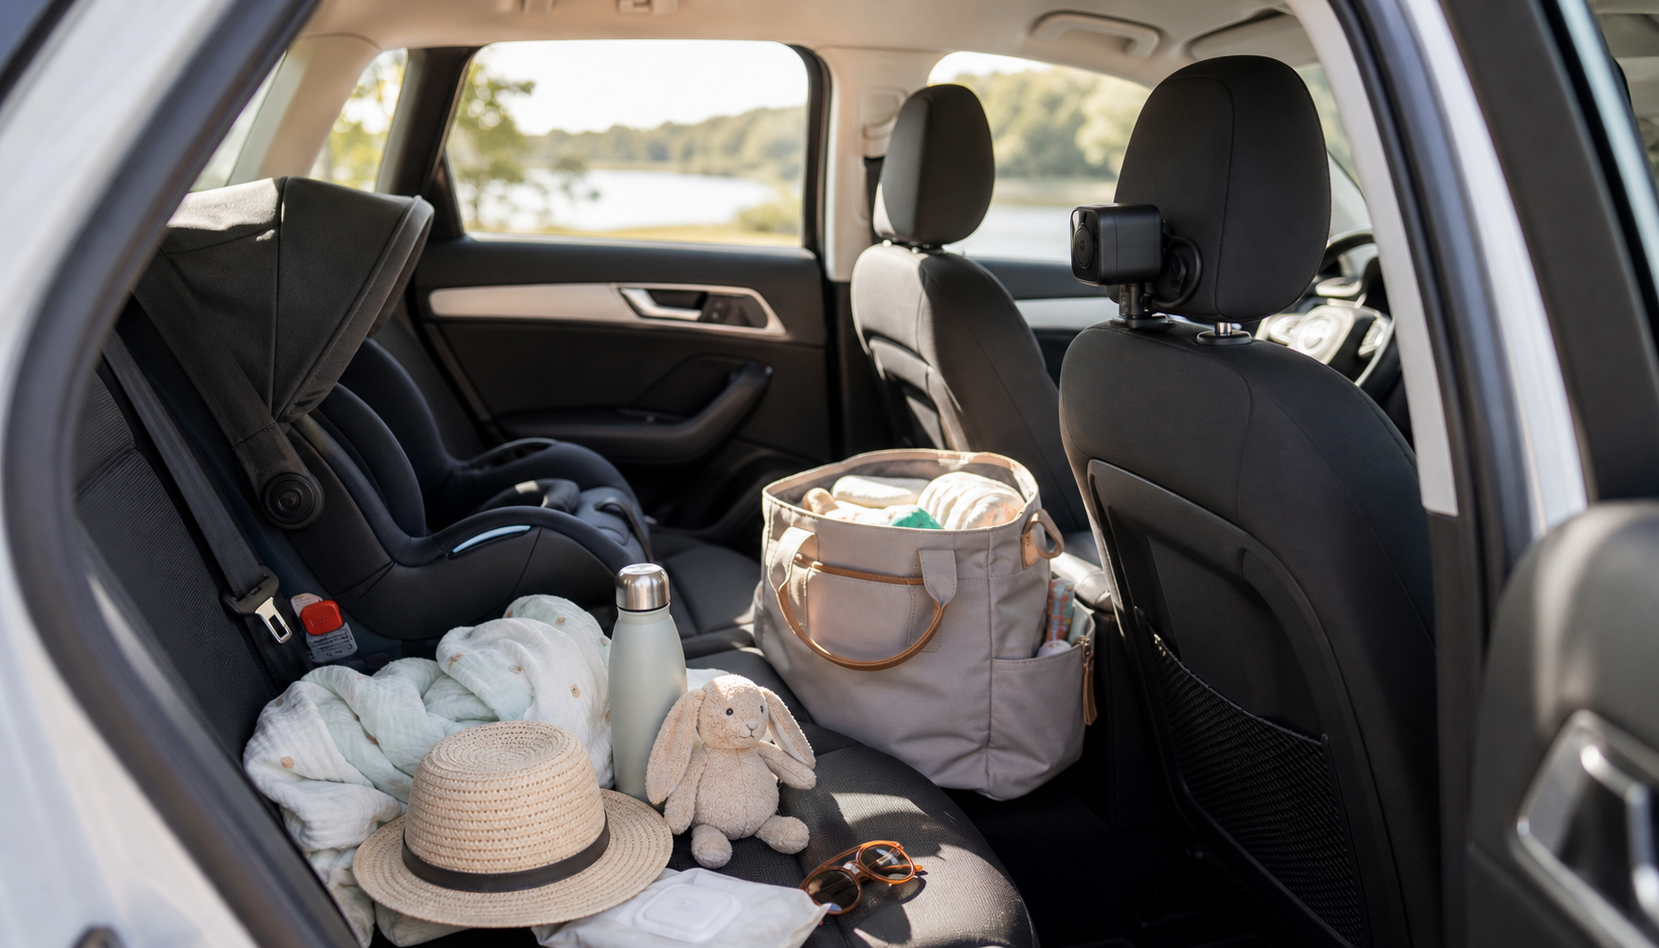
Three years old, one snack bag, and the dashboard already crowded with chargers, snacks, and a map that got folded wrong at least twice. A calm road trip is not about having no noise. It is about being ready for the moments that surprise you.
That is where a rear seat camera can help, especially for families who travel often with babies or toddlers. An extra set of eyes from the back row can be useful when your focus needs to stay on the road, not on a full-length negotiation of "who is holding the toy now."
A practical reason to start with a camera, not a gadget list
Families usually buy one of these products after one of three things happens: the baby fusses again, the rearview camera image feels too distant, or a parent gets tired of one person constantly leaning across lanes to check the child. If you are already using a rearview mirror monitor, add an in-car camera only if it improves your workflow, instead because it is on sale.
I want to be direct here. A baby car camera can make monitoring easier, but it should not replace your own glance checks, your child seat checks, or your stop-and-check routine at rest stops. It is a tool for awareness, not a replacement for safe driving habits.
What the OTTOCAST style setup can offer
The model in this guide is the OTTOCAST Baby Car Camera with wireless display on a car screen. Many families like this format because it removes extra wires and keeps the driver from becoming a dedicated monitor operator. If you are planning trips for 3 to 6 hours, this can reduce tension before and during snack breaks, diaper changes, and the final hour when everyone is tired.
As with any purchase, set your expectation first. Think in practical terms: does it make quick checks faster? Is the view stable enough to tell when your child shifts seats? Can it connect without fighting your phone? The answer to those questions is what matters, not whether the product has a perfect star rating in the title.
Before you buy, run through this 8-part check
- Mount location. A camera mounted too high can show the ceiling, and too low can give you shoulder only. For most cars, the headrest or upper rear seat area is easier to install and cleaner to monitor.
- Angle and width. Look for wide enough coverage to catch side movement. A narrow view can miss a child turning into a blanket or leaning in the seat. Choose a wide angle if your rear seat has more than one child.
- Night behavior. If your night plans include highway driving after sunset, test the no-glow or low-light mode before relying on it as your only rear-check method.
- Screen readability. Make sure the display is bright enough in daytime sun and not so bright at night that it becomes a glare source.
- Wireless reliability. Bluetooth or Wi-Fi drops are frustrating on the road. Check that the connection is stable from your driver-facing screen position.
- Audio setup. If audio is available, ask whether it is useful for your use case. A lot of parents mainly need visual checks, so do not overpay for every feature.
- Power behavior. Some setups are better for long drives than short loops. Confirm where power is needed and how long the monitor stays stable.
- Return and support path. In this product category, easy return and responsive help can matter more than one extra feature on paper.
None of those checks require a full hardware test kit. They require a clear list and one honest answer for your own trip style.
How to install it so the cab does not look like a tech store
Most people get overwhelmed by camera instructions because they are built for a single line of setup, not a real family day. If your goal is minimal clutter, take 10 minutes before departure and do a clean install.
Start by placing the camera in one of your normal driving lanes, then route the cable where it is not near seatbelt hardware. Next, secure the monitor mount so it sits where you can glance quickly, not where it blocks the windshield. If your model includes an app-based pairing option, pair once and confirm the image is locked before leaving the driveway. Keep the screen at a size that works with sunglasses and night mode.
Then make one test run: leave home, drive around the block, and check for lag, dropped signals, and tilt drift. If the image is unstable, stop and reset before your first highway mile. It is much easier to fix before traffic than after.
What changed on your first long drive
Here is where behavior changes. With a stable camera setup, parents can focus on lanes and signs while still checking body language in the back row. The camera view often helps separate true distress from normal trip boredom. A child pressing a face into the seat belt strap is not the same as true panic, and your attention can respond with a calm stop at the next safe pull-off.
Practical rule: camera on the screen is only half the system. The other half is your stop rhythm, hydration pace, and seat comfort.
That rhythm matters. If you are planning frequent rest stops anyway, you probably do not need expensive extras. A camera helps mostly when your travel window includes short stops and long stretches between clean breaks. In those cases, being able to see movement trends helps you decide whether a stop is needed now or in 20 minutes.
Roadside checklist for a safer routine
- Pause every 1.5 to 2 hours regardless of camera feed quality.
- Use one adult to check rear-view and one adult to monitor seat straps at each stop.
- Refresh camera alignment at least once each day, especially after loading snacks or changing car seats.
- Keep one blanket or toy bag near the seat edge so minor fusses are handled fast, without full cabin chaos.
These habits are boring on purpose. They are boring in a good way because boring habits prevent chaotic scenes when you are tired and distracted.
When a rear seat camera is not the right call
Some trips do insteadify the purchase. If most of your drives are under 45 minutes, a basic phone mount and a frequent stop plan might be enough. If your car already has a dependable dashcam and both adults share driving and child-watch duty, adding another screen can become overkill.
Also watch for one common mistake: trusting one gadget to solve stress that is mostly logistics. Bad naps, late meals, and too many loose seat pockets in the trunk can still make a trip rough. A clean camera setup will make monitoring easier, but it will not solve timing and packing issues on its own.
How this fits into a full Amazon decision, without the fluff
For families that do want the OTTOCAST Baby Car Camera, the decision should still include a price check, return policy, and real compatibility with your car. If the listing includes the features you use, and your review of nearby users is mixed but practical, it can be a good trip helper at a predictable price point.
Here is the model currently in focus for this guide:
OTTOCAST Baby Car Camera (1080P, Wide Angle, No-Glow Night View)
If you click through, compare current listing details against your actual car setup, especially mounting points and phone or screen compatibility. The safest way to buy is still: choose, verify in a parked car, and keep a 30-day return strategy in mind.
Final thought for the next trip
A road trip is never truly calm until the setup is simple. A camera can help if it replaces panic with visibility and replaces clutter with a quick routine. If your car already feels like a small office every time the kids board, this is where an organized camera install can make the biggest difference: not because it adds tech, but because it removes repeated small friction.
Use the camera as one small part of a larger system. A good seat-check routine, safe spacing between stops, and a backup snack plan will do more for your sanity than any single model. When those pieces are in place, the camera helps you stay present instead of constantly distracted by small repeated moments. That is the real value for a family road trip.